Writing and Reading NFC in Flutter: The Ultimate Guide
Near Field Communication (NFC) technology enables seamless communication between devices within close proximity. When NFC is enabled on a smartphone, users can easily read and write data to NFC tags, unlocking various real-world applications.
This tutorial will guide you through reading and writing NFC tags in Flutter using the nfc_manager package. We will create a simple Flutter app that:
✔ Saves a URL onto an NFC tag.
✔ Retrieves the saved URL when the tag is scanned using an NFC-enabled device.
✔ Opens the URL automatically in a web browser upon scanning.
By the end of this guide, you’ll have a solid understanding of Flutter NFC integration and how to implement NFC functionality for both Android and iOS applications.
Benefits of NFC in Flutter
NFC technology powers various use cases across industries, including:
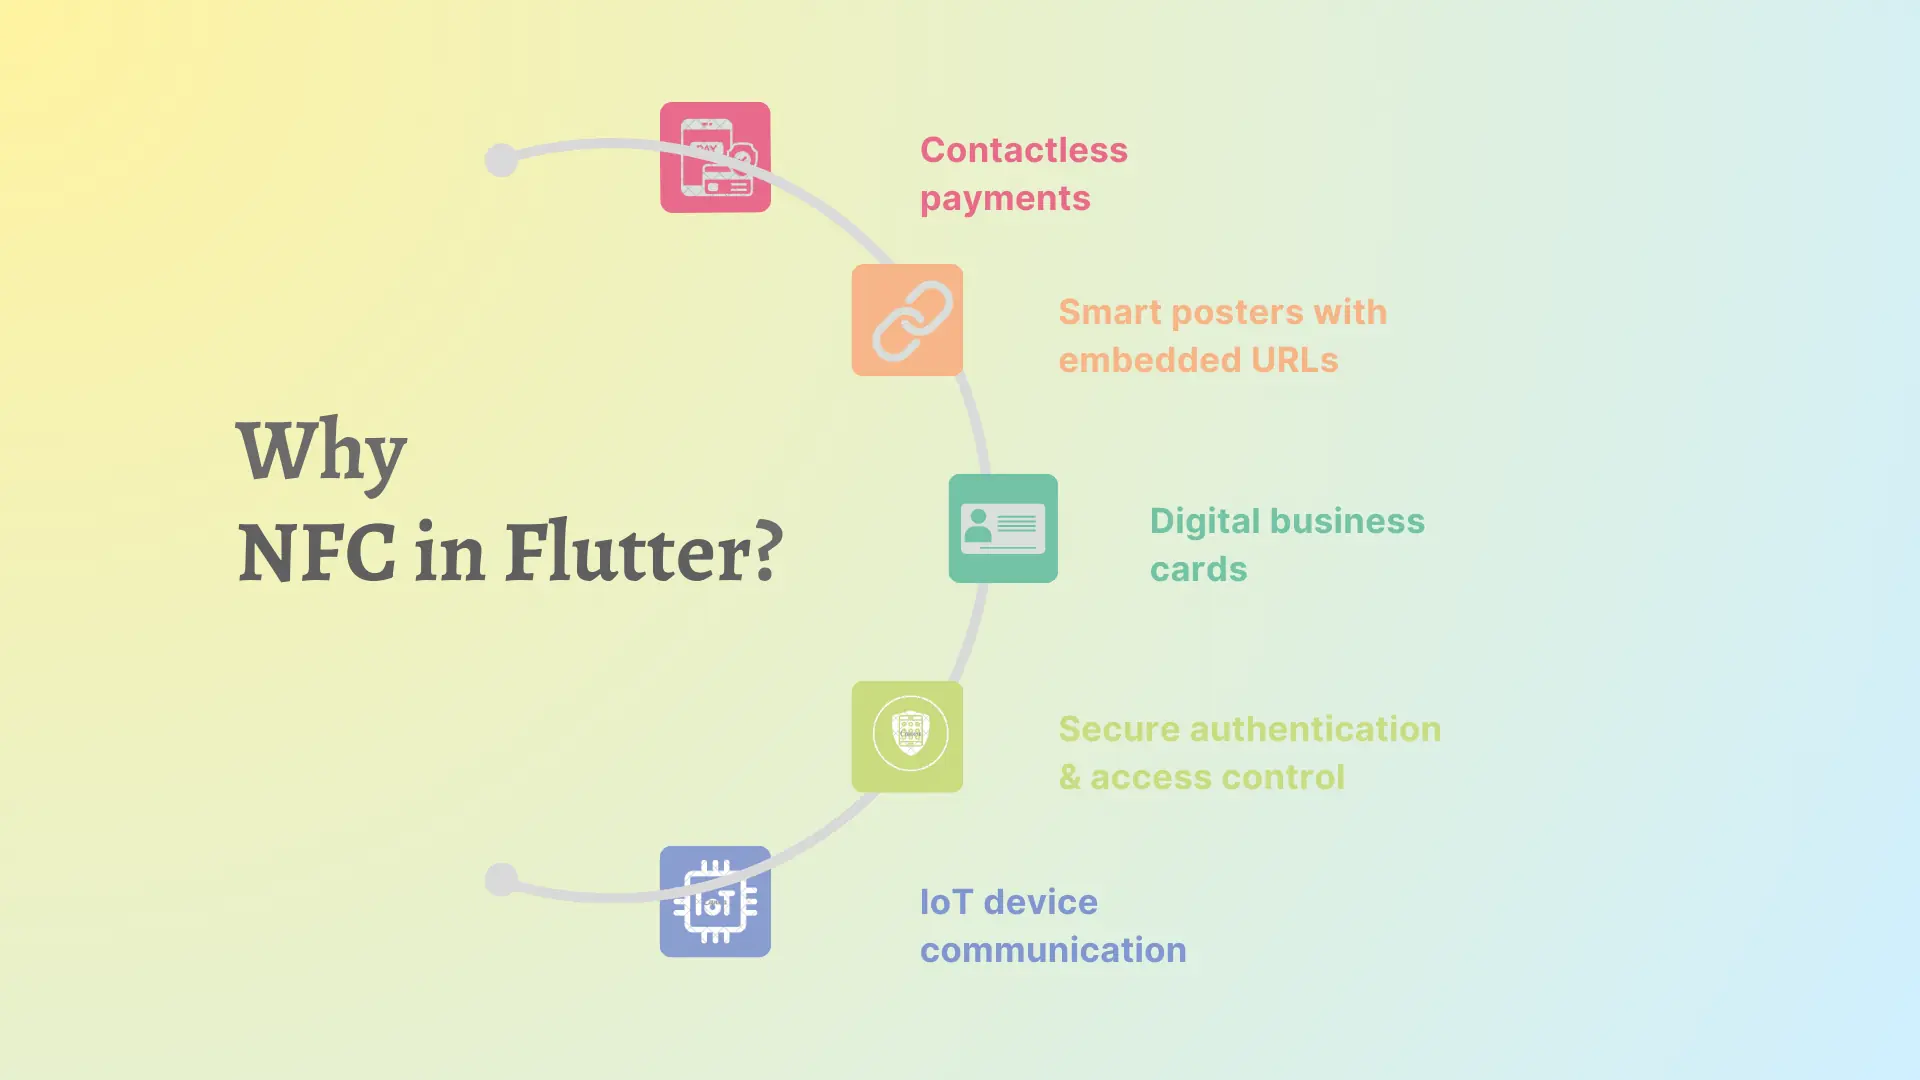
- Contactless payments
- Smart posters with embedded URLs
- Digital business cards
- Secure authentication & access control
- IoT device communication
Flutter, a powerful cross-platform framework, allows developers to integrate NFC in Flutter for both Android and iOS. However, NFC writing is currently limited to Android due to Apple’s restrictions.
Important Notes for iOS and Android Users
- iOS: iPhone 7, 8, and X models do not support automatic NFC background reading. Users must manually activate the NFC reader from the Control Center.
- Android: NFC functionality varies by device manufacturer and model. Most modern Android devices support background NFC reading, but some older models may require manual activation in settings.
Setting Up the Flutter Project
To begin, create a new Flutter project:
flutter create nfc_demo
cd nfc_demo
Next, add the required dependencies to pubspec.yaml:
dependencies:
  flutter:
    sdk: flutter
  nfc_manager: ^3.5.0
  url_launcher: ^6.3.1
Run:
flutter pub getto install the packages.
Platform-Specific Configurations
Android Configuration
Modify android/app/src/main/AndroidManifest.xml to include NFC permissions:
<uses-permission android:name="android.permission.NFC" />
<uses-feature android:name="android.hardware.nfc" android:required="true"/>
Declare NFC tech lists:
<intent-filter>
    <action android:name="android.nfc.action.NDEF_DISCOVERED" />
    <category android:name="android.intent.category.DEFAULT" />
    <data android:mimeType="text/plain" />
</intent-filter>
iOS Configuration
Enable NFC capabilities in Xcode and update ios/Runner/Info.plist:
<key>com.apple.developer.nfc.readersession.formats</key>
<array>
    <string>NDEF</string>
</array>
<key>NSNFCReaderUsageDescription</key>
<string>This app requires access to NFC to read and write data to NFC tags.</string>
Implementing NFC Writing in Flutter
Let’s create a UI for users to enter a URL and write it to an NFC tag.
Code for Writing NFC Data (nfc_write_data.dart)
import 'package:flutter/material.dart';
import 'package:nfc_manager/nfc_manager.dart';
import 'package:url_launcher/url_launcher.dart';
import 'dart:convert';

class NfcWriteData extends StatefulWidget {
  const NfcWriteData({Key? key}) : super(key: key);

  @override
  State<NfcWriteData> createState() => _NfcWriteDataState();
}

class _NfcWriteDataState extends State<NfcWriteData> {
  bool _isScanning = false;
  String _urlToWrite = "https://example.com"; // Default URL

  @override
  Widget build(BuildContext context) {
    return Scaffold(
      appBar: AppBar(
        title: const Text('NFC Write & Read'),
      ),
      body: Column(
        children: [
          TextField(
            decoration: const InputDecoration(labelText: 'Enter URL to write'),
            onChanged: (value) => setState(() {
              _urlToWrite = value;
            }),
          ),
          ElevatedButton(
            onPressed: () => writeData(_urlToWrite),
            child: const Text("Write URL to NFC Tag"),
          ),
          ElevatedButton(
            onPressed: () => startReading(),
            child: const Text("Start NFC Reading"),
          ),
        ],
      ),
    );
  }

  void writeData(String url) async {
    NfcManager.instance.startSession(onDiscovered: (NfcTag tag) async {
      var ndef = Ndef.from(tag);
      if (ndef == null || !ndef.isWritable) {
        _isScanning = false;
        NfcManager.instance.stopSession();
        return;
      }

      NdefMessage message = NdefMessage(
        [NdefRecord.createUri(Uri.parse(url))], // Writing URL as URI record
      );

      try {
        await ndef.write(message);
        NfcManager.instance.stopSession();
        setState(() {
          _isScanning = false;
        });
      } catch (e) {
        NfcManager.instance.stopSession(errorMessage: e.toString());
        setState(() {
          _isScanning = false;
        });
      }
    });
  }
}
How It Works
- Users enter a URL.
- The app writes the URL to an NFC tag using
NdefRecord.createUri(Uri.parse(url)). - If writing fails, an error is displayed.
Implementing NFC Reading in Flutter
A device equipped with NFC technology must read the URL stored on the tag before automatically launching the browser to display it.
Code for Reading NFC Data (Integrated in nfc_write_data.dart)
void startReading() {
  NfcManager.instance.startSession(onDiscovered: (NfcTag tag) async {
    var ndef = Ndef.from(tag);
    if (ndef == null) {
      NfcManager.instance.stopSession();
      return;
    }

    NdefMessage? message = await ndef.read();
    if (message.records.isNotEmpty) {
      NdefRecord record = message.records.first;
      String payload = utf8.decode(record.payload);
      payload = payload.substring(1); // Remove identifier byte

      Uri? url = Uri.tryParse(payload);
      if (url != null && await canLaunchUrl(url)) {
        await launchUrl(url); // Opens URL in browser
      }
    }

    NfcManager.instance.stopSession();
  });
}
How It Works
- The app listens for NFC tags.
- It reads the URL and decodes it.
- If a valid URL is found, it opens the browser using
url_launcher.
Adding a Visual Indicator for NFC Scanning
To enhance user experience, we can display a scanning animation.
Code (nfc_wrapper_view.dart)
import 'package:flutter/cupertino.dart';
import 'package:flutter/material.dart';

class NFCWrapperView extends StatelessWidget {
  const NFCWrapperView({super.key, required bool isScanning}) : _isScanning = isScanning;

  final bool _isScanning;

  @override
  Widget build(BuildContext context) {
    return Container(
      width: 250.0,
      height: 250.0,
      decoration: BoxDecoration(
        color: _isScanning ? Colors.green[100] : Colors.amber[100],
        shape: BoxShape.circle,
      ),
      child: Center(
        child: Icon(
          CupertinoIcons.radiowaves_right,
          size: 100,
          color: _isScanning ? Colors.green[400] : Colors.amber[400],
        ),
      ),
    );
  }
}
Conclusion
In this tutorial, we explored Flutter NFC integration by implementing NFC reading and writing using the nfc_manager package.
We covered:
- Writing a URL to an NFC tag.
- Reading and extracting data from an NFC tag.
- Automatically opening the URL in a web browser.
- The role of an NFC-enabled device in reading and launching the stored URL.
You can extend this approach to store contacts, authentication tokens, or custom data formats. Try implementing Flutter NFC reader in your own projects and explore its endless possibilities!
FAQs
iOS devices do not support NFC writing due to Apple’s restrictions. Apple only allows reading NFC tags using the NFCNDEFReaderSession API, but writing is not permitted for third-party applications.
No, not all smartphones support NFC. While most modern Android devices have NFC functionality, some low-end models might not include NFC hardware. On iOS, only iPhone 7 and newer models support NFC reading, and NFC writing is restricted.
There could be several reasons:
1. NFC is disabled on the device. Ensure that NFC is turned on in the settings.
2. The tag is not an NDEF-formatted tag. Only NDEF tags are supported by the nfc_manager package.
3. Hardware compatibility issues—some devices may have limited NFC functionality.
4. Incorrect intent filters on Android (AndroidManifest.xml should include the correct intent-filter).
Yes, you can write various types of data, such as text, contact details (vCard), authentication tokens, and commands for IoT devices. However, your NFC tag must support the required data format.
If you don’t have an NFC tag, you can use Android Emulator with NFC support (available in some models) or an NFC-enabled second device in P2P mode. However, iOS does not offer NFC emulation.
No, contactless payments using NFC (such as Apple Pay and Google Pay) require special APIs that are not accessible via nfc_manager. You need to use Apple Pay and Google Pay SDKs for payments.
1. Data interception: NFC has a short range, but data can still be intercepted if an attacker is close enough.
2. Malicious tags: An NFC tag could be programmed to open a phishing website. Always validate the data before launching a URL.
3. Unauthorized writing: If a tag is writable, someone else might overwrite the data. Using write protection on NFC tags can prevent this.
This can happen due to:
1. Incorrect URL format (ensure the NFC tag contains a valid URI record).
2. Permissions issue (on iOS, user interaction is required before launching a URL).
3. OS-level restrictions (some Android versions may block automatic navigation for security reasons).